LaunchPack
As mentioned in the LaunchPack section under Concept, LaunchPacks are required to create deployments. You can either use a platform-wide LaunchPack that's provided by dKloud or create your own.
Platform-Wide LaunchPacks
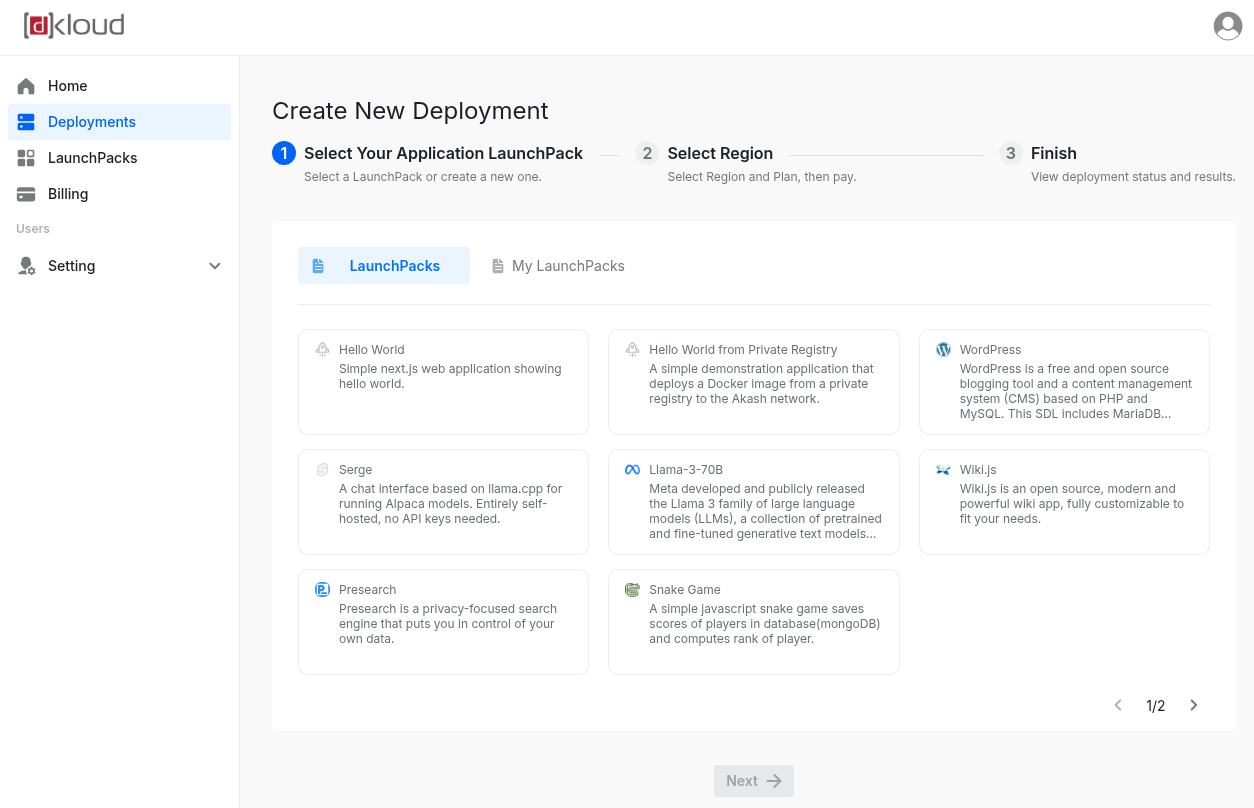
To see the platform-wide LaunchPacks, you can navigate to the Deployments page by clicking on the link on the left navigation bar and then clicking on the New Deployment button. The first page that appears will be a list of platform-wide LaunchPacks:
Custom LaunchPacks
Creating a custom LaunchPack is essentially specifying your own deployment with your own specifications. To create a new LaunchPack, navigate to the LaunchPack page by click on the LaunchPacks link on the left navigation bar. Then click on the Create LaunchPack button. A form will appear for you to fill in all the neccessary information to create a LaunchPack:
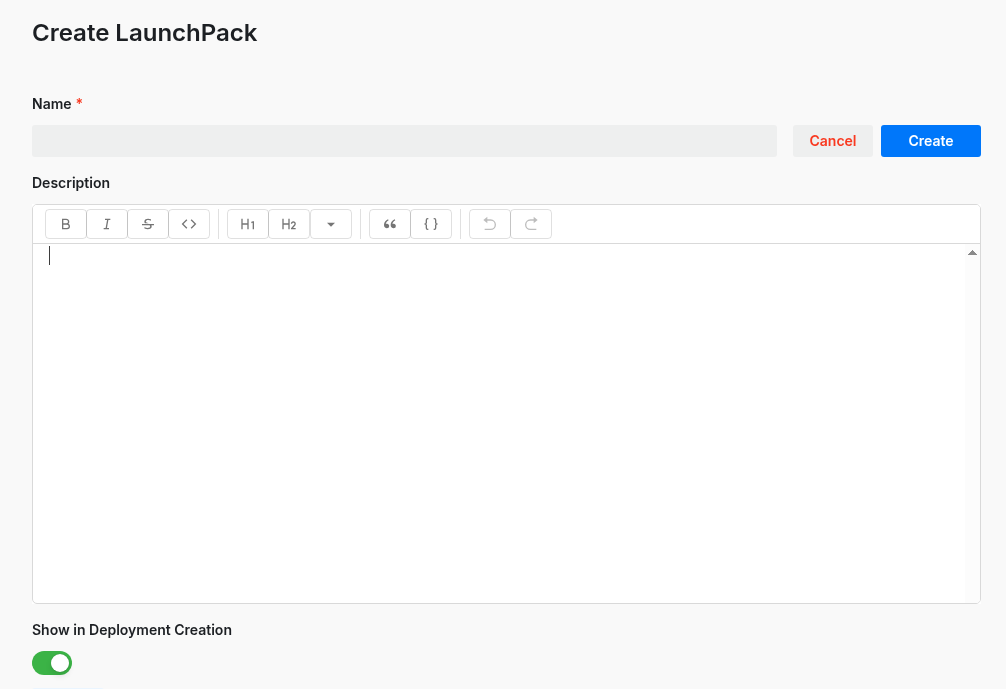
Fill in a name of the LaunchPack and optionally enter a description. Ensure that the Show in Deployment Creation toggle is turned on so that it will show up when you create a deployment. Then, scroll down to the builder form:

Fill in the minimum of the below fields for the container to deploy:
- Docker Image URL
- Registry credentials (if private registry):
- Username
- Password
- vCPU allocation
- GPU specifications (if required)
- Memory allocation
- Ephemeral storage allocation
- Environment variables
- Network ports to expose
As you can tell, there's an Add Service button in the bottom. Simply click that to add other containers you want to deploy under this LaunchPack and another builder form will appear below for you to fill in.
After you are done, scroll back up to the top and click the Create button next to the name field.
You have now created a LaunchPack and will see it in the list of LaunchPacks in the LaunchPacks page.