Create a Deployment
To create a deployment, ensure you have a LaunchPack already created for your deployment as defined by the previous section. From there, you can click on the New Deployment button in either the Home page or the Deployment page. The New Deployment page will then appear:
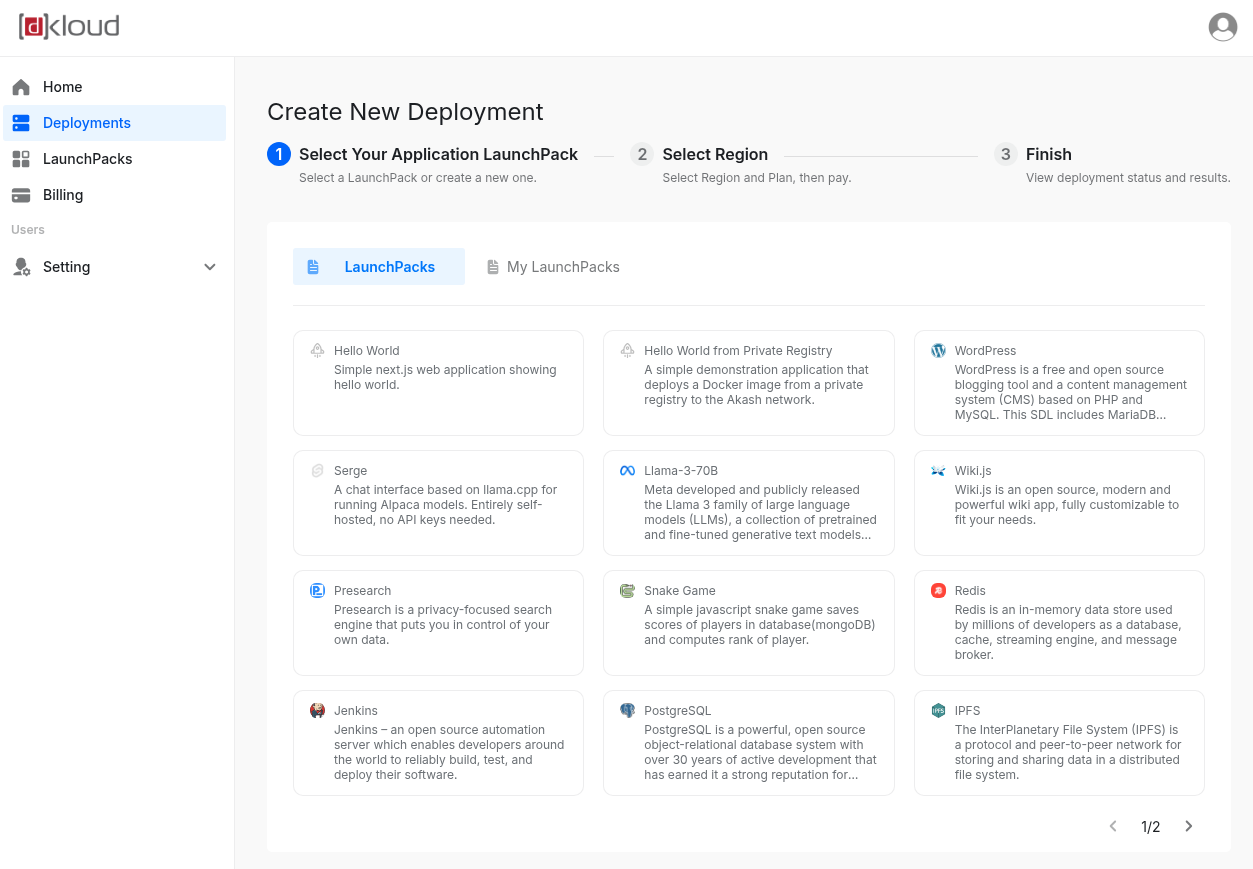
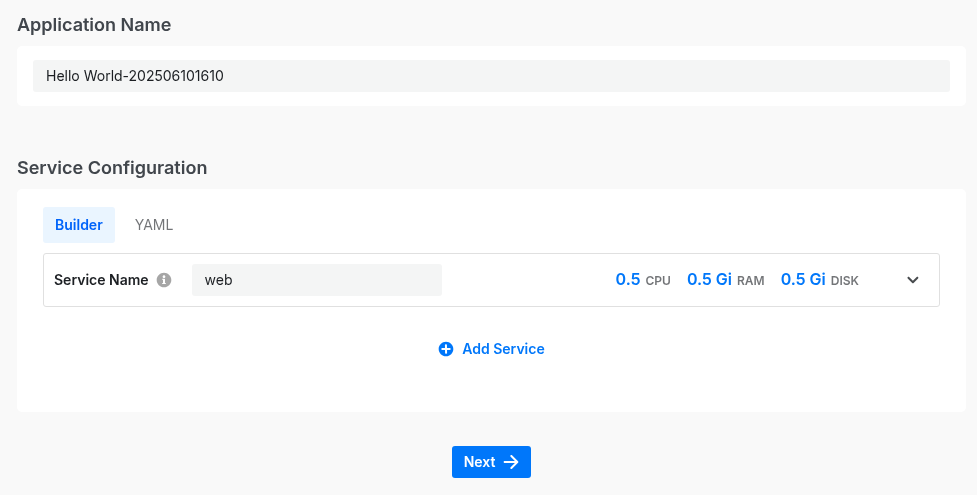
Select a LaunchPack to deploy. For the purpose of demonstrating this flow, we will choose the Hello World LaunchPack. After Hello World is selected, a builder form will appear to allow the user to make any last minute changes if required. If not, just click Next:
KloudDeploy will then do all the Blockchain magic neccessary to create a list of available providers and generate associating price plans for the user. This part is what usually takes a bit longer. Be patient and the list will load when the query and calculations are completed:
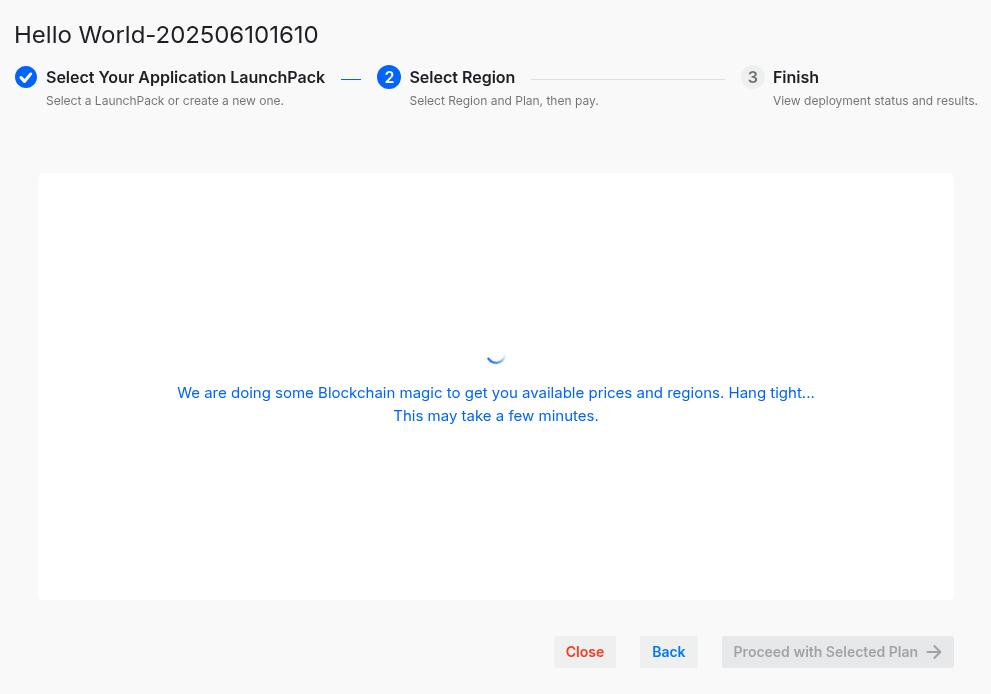
When the magic is done, the user will see a screen like the one below:
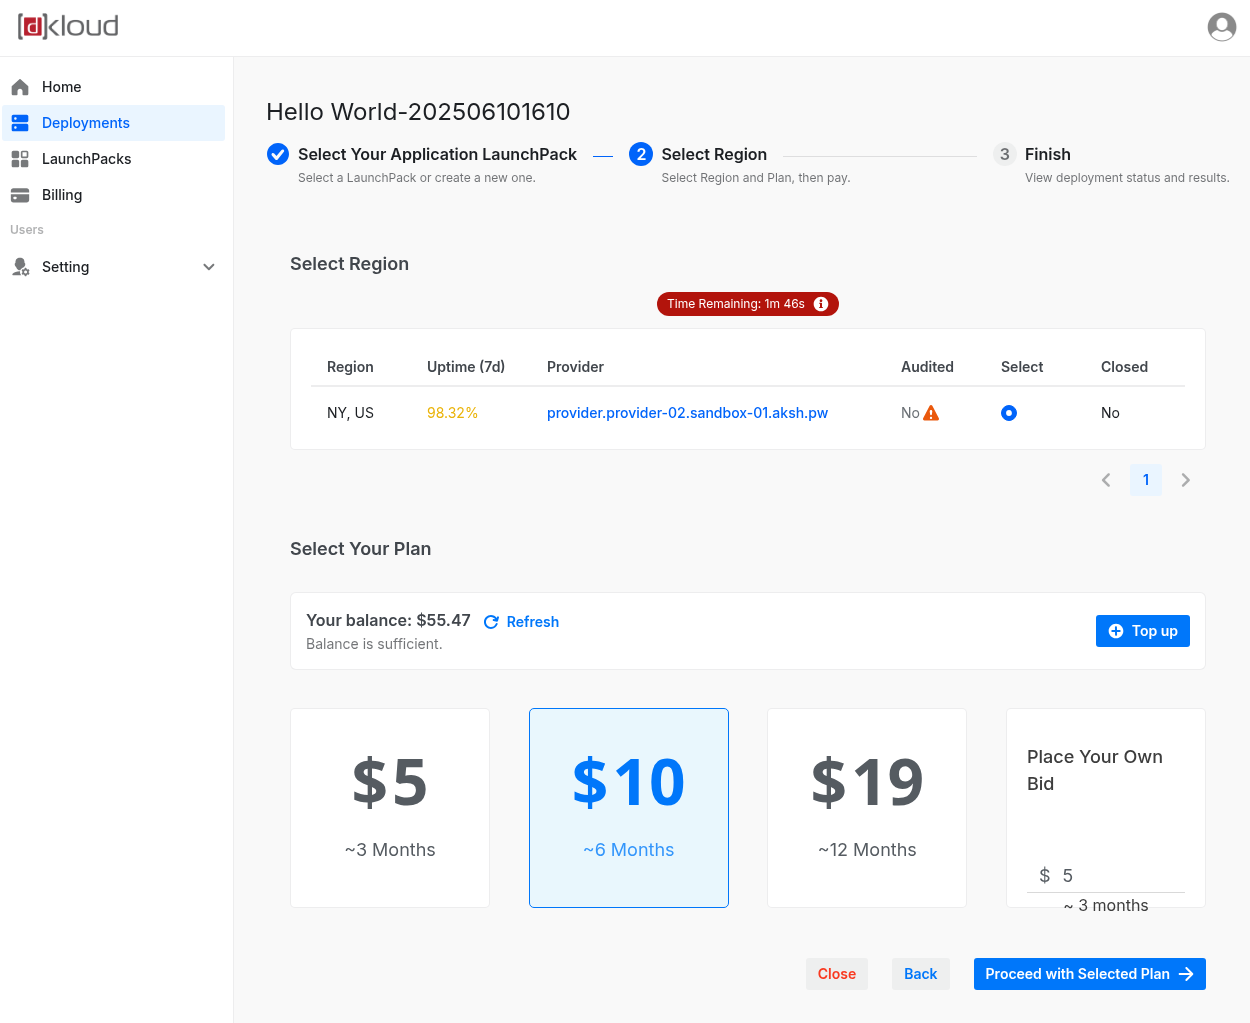
Normally, there are many more providers to choose from but we walked through this flow with our staging site on testnet so therefore, there was only one provider.
From here, choose the plan that you want which we chose 6 months per the screenshot above. Then, click on the Proceed with Selected Plan button.
The deployment will then begin:
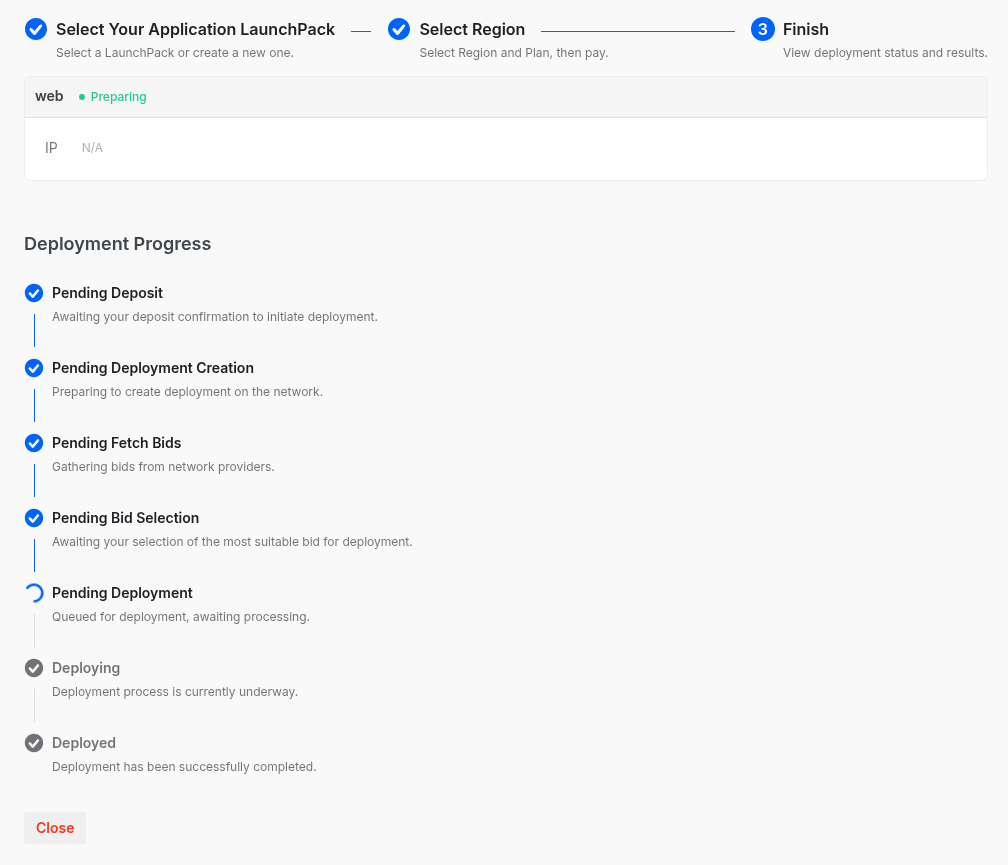
When the deployment is complete the box above Deployment Progress will show an IP and a FQDN of the deployment:

The user can then use this info to either create an A record or CNAME in their DNS settings so that the application works under a custom domain.